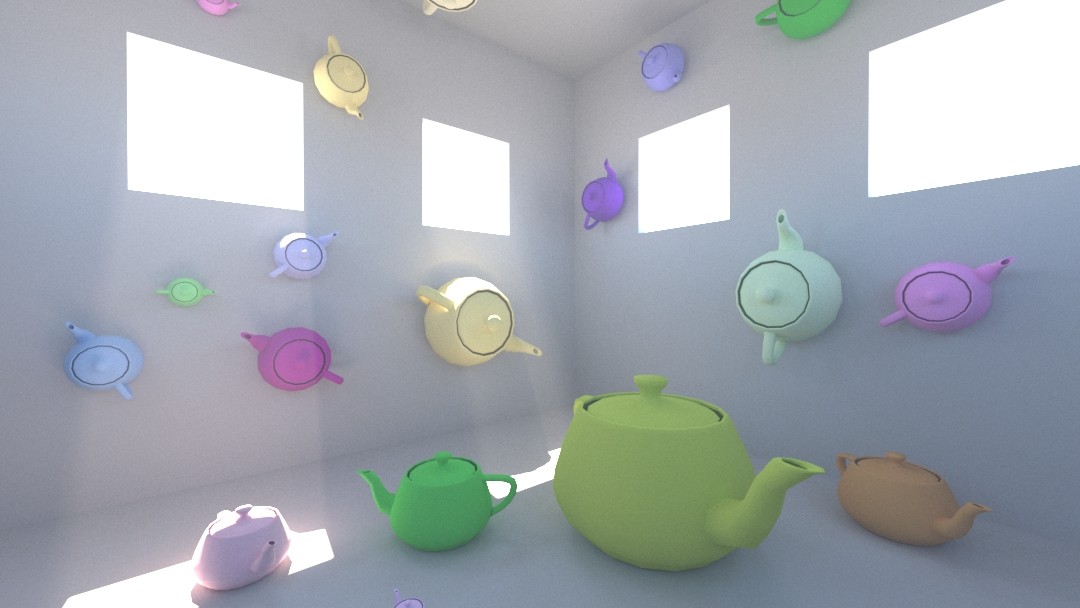

I don’t often use VrayEnvirnonmentFog, but I did want to take a few minutes to point out how to control it and get the results that you want. I don’t want to get into all of the settings, but I do want to go through enough to give you an quick understanding. To start off, adding it to your scene, if you haven’t used it before can be a bit tricky to find. You have to open the Environment window (8 on your keyboard), or Rendering -> Environment on the menu. Then scroll down under Atmosphere and click the “Add…” button, and choose VRayEnvironmentFog. The image on the left is the scene that I will be describing for this post. The lighting is simply a daylight system with vray sun and the DefaultVRaySky (VRaySky) in the Environment Map. Render settings are all default from vray 3.60.03.
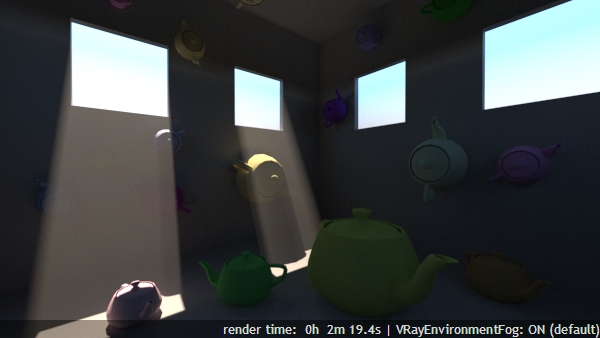
You can see simply adding VRayEnvironmentFog and rendering with the default settings does some really strange things to your scene, primarily being much darker. Also you will notice that by default the fog will be generated by all of the lights in your scene. Since we just have a sun, then it’s not so much an issue, but if you just one light you want to cast fog, then you can control that from the VRrayEnvironmentFog nodes rollout. You may also notice that the default fog height is set to 8’4″. Because this room is 10′ tall, you can see the band where the fog stops. Adjusting the fog height will fix this.
Fog Distance
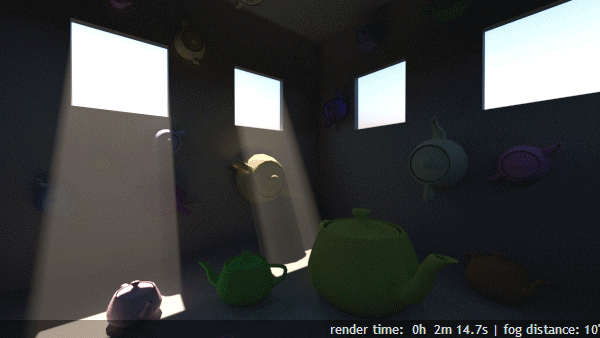
The first thing we will look at is the fog distance. This controls the fog density. Larger values will appear to make the rendering brighter, but also will make the fog more transparent. The density can also be controlled with a texture map. You will notice that increasing the distance amount, not only makes the image brighter, but increases render times…just slightly. The default fog distance is 8’4″, but you can see how increasing it to 60′ makes the image brighter since the fog is more transparent.
Scatter GI
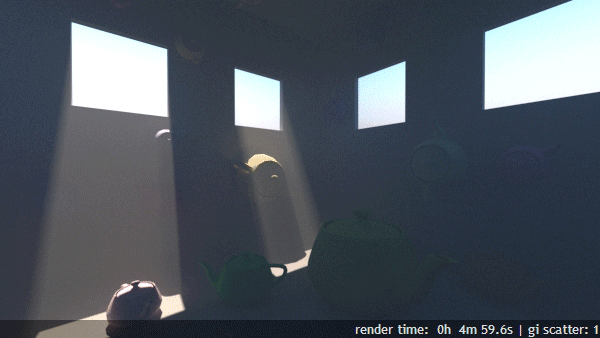
Basically, when this is turned on, the fog will scatter GI. This feature is much slower than changing the fog distance. Once it’s turned on it will use the scatter bounces amount for calculating. The default for the scatter bounces is set to 1. As you can see in this example increasing the bounces from 1 to 2 increased the rendering time from 5 min to 12 min. So, you’d think increasing it from 2 bounces to 3 would increase the rendering time even more, but something interesting happens here. Increasing the bounces beyond 2 actually reduces rendering times. In fact 4 bounces was faster than 3, and 5 was even faster than 4. Now I did not continue to test the bounces beyond 5 for this example, and I would doubt increasing it simply reduces rendering times infinitely. I’m sure there is a tipping point, but the idea is that where more light gets bounced into the scene, it becomes much easier for v-ray to calculate.
All Together Now!

Now combining the higher fog distance along with GI turned on creates a much better result than each individually. Increasing the scatter bounces to 5 along with a fog distance of 60′ visually creates close to the same lighting result as the rendering without using fog. Overall though VRayEnvironmentFog does take a hit on your render time. As you’ve seen, tweaking these settings, will vary the render times quite a bit.
Happy rendering!