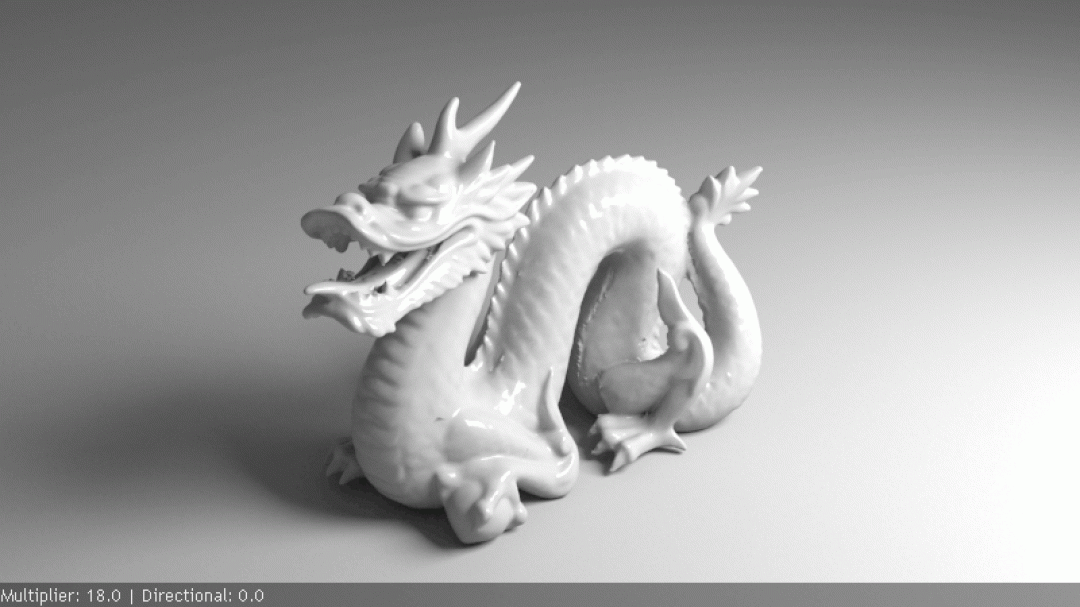
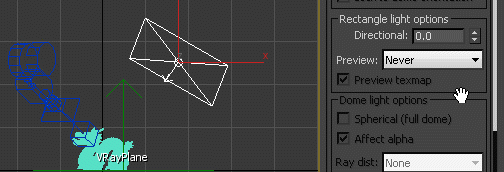
V-ray is great, the GI, the speed. But how do you create a spotlight with a v-ray light? It can be done! Typically when you create a v-ray light, by default, it is a v-ray light plane. At first glance there only appears to be options to control the intensity and size of the light, but not the distribution.
 If you select your light, and scroll down. There is a section called Rectangle light options. This hiding, magical area allows you to control the distribution amount of your light. By default the direction is set to “0.0” and the preview is set to “Never”. When you switch preview to Selected or Always, then you will see in the viewport how a v-ray light is distributed.
As you will see, 0,0 is a parallel distribution to the light plane itself. As you adjust the direction to 1.0, the distribution of light goes to a perpendicular behavior. This also works for discs if you want a round light.
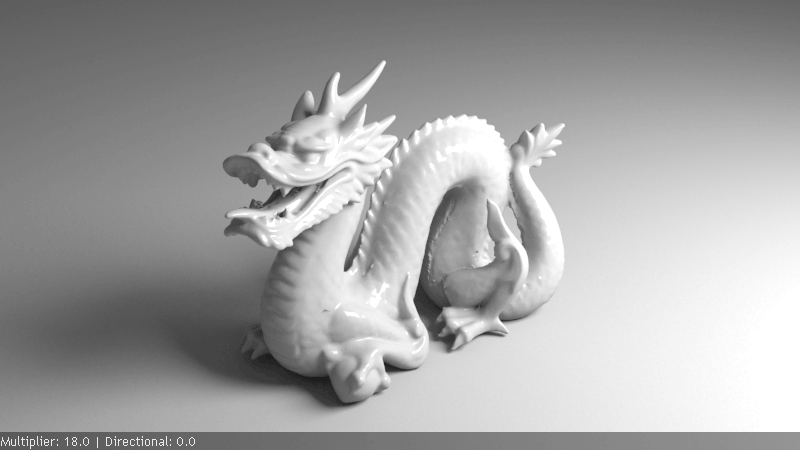
In the image above, you can see as the direction increases to 1.0 the shadows become sharper much like a regular spot light. One thing to note, as the direction increases the intensity also appears brighter as the light is focusing all of its intensity into a more focused location. To compensate, you can see that I lowered the light multiplier as I increased the direction. There is probably an inverse formula between the multiplier value and the direction value to keep your intensity consistent direction values, but I have not figured it out yet.
Happy lighting!